10 KiB
+++ title = "OrangePi 5 Ultra with Armbian: my experience" date = 2025-07-20 description = "My experience on installing an Orange Pi 5 Ultra for self-hosting." insert_anchor_links = "left" [taxonomies] tags = ["electronics"] +++
My current server is a Raspberry Pi 4 with 8GB RAM and a USB3.1 SSD. It's nice but a bit slow for all the services I'm hosting.
Choose the best SBC
I started by comparing the existing single-board computers (SBC) for my needs.
Requirements
- ≥ 8 GB RAM
- SATA or NVMe or anything else than USB to connect SSD or HDD
- GB Ethernet
- CPU ≥ 4 cores
- CPU ≥ RPi4
- Good mainstream Linux support
- Power < 20 W
- Price < 200 €
Comparison
(made in February 2025)
(*) CPU is expressed relatively to RPi4 performance. A tilde ~ means a rough approximation that should be replaced with a benchmark.
| Board | Price | RAM | Cores | CPU* | Storage | Network | Power | Support |
|---|---|---|---|---|---|---|---|---|
| BPI-F3 | 70€ | any DDR4 | 8 | <1 | PCIe2 | 2×1GBE | Bad (RISC-V) | |
| BPI-M5Pro | 160€ | any DDR4 | 8 | PCIe2 | 2×1GBE | |||
| BPI-M7 | 170€ | any DDR4 | 8 | 4 | PCIe3 | 2×2.5GBE | ||
| Lichee 4A | any DDR4 | 4 | 1 | USB3.0 | 2×1GBE | |||
| OrangePi 5 Ultra | 150€ | any DDR5 | 8 | 4 | PCIe3 NVMe | 2.5GBE | 10W | |
| Pine64 ROCKPro64 | 80$ | 4GB DDR4 | 4 | ~0.75 | PCIe(?) | 1GBE | ||
| Radxa Tock 5 ITX | 160$ | any DDR5 | 8 | 4 | PCIe3 NVMe + 4×SATA | 2×2.5GBE | 15W | Bad |
| Radxa Rock 5B+ | 150$ | any DDR5 | 8 | 4 | 2×PCIe3 NVMe | 2.5GBE | 11W | Bad |
| Radxa X4 | 120€ | any DDR5 | 4 | 5 | PCIe3 NVMe | 2.5GBE | 20W | Good (x86) |
| Renegade Elite ROC-RK3399-PC | 80€ | 4GB DDR4 | 6 | ~2 | PCIe2 | 1GBE | ||
| RPi4 | 80$ | 8GB DDR4 | 4 | 1 | USB3.1 | 1GBE | 5W | Good |
| RPi5 | 120$ | any DDR4 | 4 | 3 | PCIe2 | 1GBE | 6W | Good |
| Zima Board | 200€ | 8GB DDR4 | 4 | 2×SATA | 2×1GBE | 6W |
The brand Olimex is interesting too but for lower performance.
Final contenders:
- Radxa Rock 5B+
- 2× PCIe3 2-lane
- OrangePi 5 Ultra
- PCIe3.0 4-lane
I chose the Orange Pi because I needed only one SSD, so 4 lanes should be faster.
Bill of materials
Official OrangePi distributors are only on AliExpress. I won't give links here as they will probably be outdated soon.
- OrangePi 5 Ultra
- Good USB-C power supply (GaN, ≥ 4A, read comments carefully because some are crap)
- The biggest passive heatsink available
- SSD M.2 2280 NVMe PCIe3
Choosing a good power supply is really important. A cheap unit may make your system unstable you will regret it.
I took a passive heatsink because integrated fans are small and loud. I prefer to fix a quiet PWM laptop fan after.
As I was about to move without my 3D-printer, I made a case with OpenSCAD in a hurry. My model is not very adjusted and quite fragile if the printer is not precise enough. The fact that Orange Pi does not publish mechanical schematics does not help... I will share the source of a revised version later.
Installing an OS
My RPi is working well with Debian Raspi, which I prefer over Raspbian as it's cleaner, closer to the official Debian, and contains less proprietary blobs. But it won't work on Orange Pi.
Orange Pi provides an official distribution but it's probably an experimental proprietary crap impossible to maintain and with Chinese documentation, no thanks.
I'm testing Armbian for OPi5 Max as OPi5 Max is almost the same as OPi5 Ultra.
Flash the SD card
As usual the image is made for booting on an SD card.
No need to use a fancy dedicated tool, dd is your friend:
sudo dd if=armbian.img of=/dev/SDCARD status=progress bs=512
On the first boot, plug a screen and a keyboard, as the installation program asks for usernames and passwords to create.
You now have a shell, can setup SSH and update Debian as usual.
Installing to NVMe
Do not let an OS live on an SD card, it will wear very quickly and corrupt the filesystem. That's why I don't just want to move specific data folders to the SSD, but the entire system (except /boot).
Sadly armbian-install seems quite experimental and obscure to use.
Warning: Maybe this step can brick your board's internal flash memory. It worked for me, but I don't know how, and I wouldn't do it again.
sudo armbian-install
# Choose 7 (flash bootloader)
Then restart: sudo shutdown -r now
Then it wouldn't boot anymore (the LEDs stayed off). I power-cycled multiple times and pressed the "boot" button, and at some point it booted!
It's still booting on the SD card, but it loads the system on the SSD. The only problem it that grub/kernel/firmware updates will be written to the SSD, not the SD card, so they must be copied by hand. But... it works!
Cooling
The first thing to improve passive cooling is to place the board vertically. Compared to horizontal position, it may reduce temperature by up to 10°C.
There are big copper heatsinks on AliExpress, including bolts and thermal paste. I took the biggest one and it already does a great job, keeping the chip at 30°C idling. But it was summer and I want to run more services on this server, so I needed a fan.
I had an old CPU fan with PWM. It's interesting because I can set it to the lowest speed in order to be quiet.
Note: only 4-pin fans have PWM. 3-pin fans have a speed sensor, but no speed control.
Problem is that it's a 12V fan, while the board is powered at 5V. So I need an external power supply.
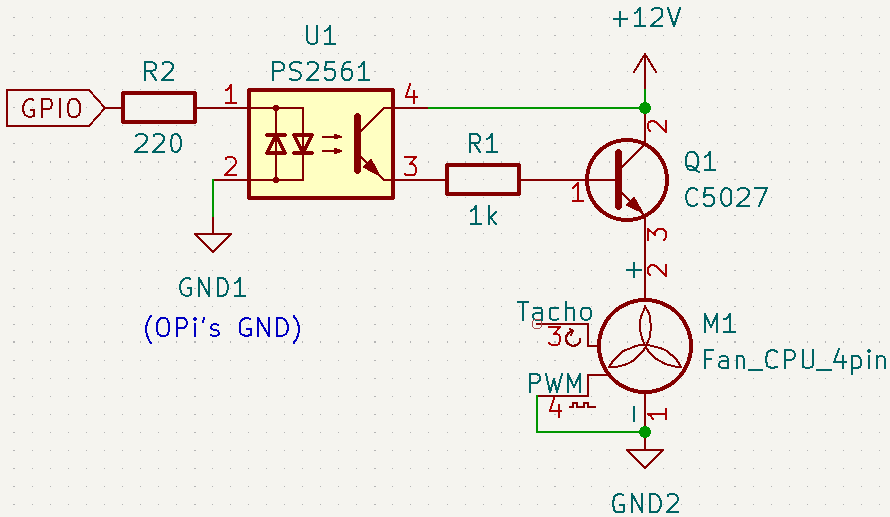
To avoid adding electrical noise to the Pi, I made a simple isolated control circuit, using a few salvaged components:
- an optocoupler PS2561 from a switch-mode power supply: it allows switching high voltage/low current from a low voltage/low current source, while electrically isolating the two circuits.
- an NPN power transistor C5027: drives fan's power from the optocoupler's output.
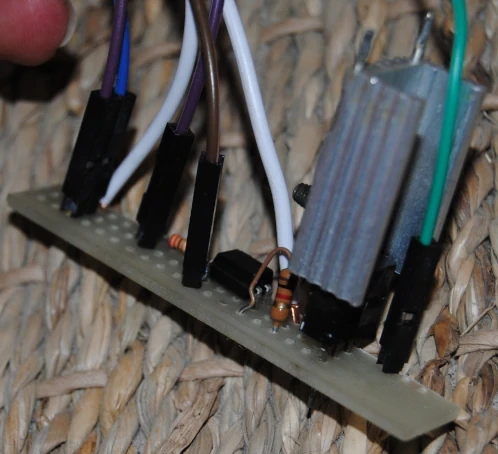
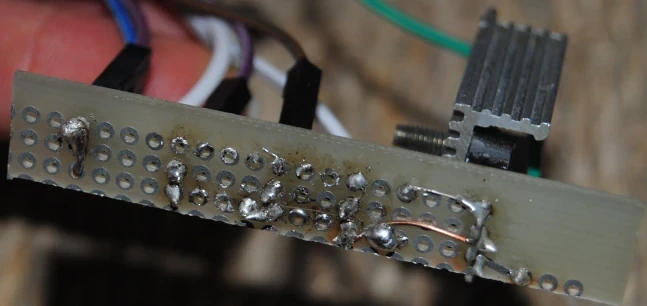
Please don't judge the soldering, I only used salvaged material:
I made a program to control the fan depending on the CPU temperature.
The LEDs
The board has a green LED and a blue LED that can be controlled. By default, they are pulsing heartbeats. That may be convenient as it indicates the system has booted correctly. The heartbeat frequency also depends on the system load.
As they are quite bright, they can get annoying, especially if the server is in the living room where someone may want to watch a movie or sleep on the couch.
The following commands disable the heartbeat behavior, and switches off the LEDs.
echo none | sudo tee /sys/class/leds/blue_led/trigger
echo none | sudo tee /sys/class/leds/green_led/trigger
echo 1 | sudo tee /sys/class/leds/blue_led/brightness
echo 1 | sudo tee /sys/class/leds/green_led/brightness
Heartbeat can be enabled again by replacing none with heartbeat. The LEDs can be switched on by replacing 1 with 0 (I guess it represents the cathode voltage).
These settings are not permanent. To make it persist after reboot, add these commands to /etc/rc.local.
Remaining problems
I don't have an IPv6 interface? That's probably because of Armbian (or the model mismatch) as it's a nightly community version.
Conclusion
Orange Pi 5 Ultra is a great board: relatively cheap, seemingly good quality, very good performance, heatsinks and other gadgets available.
However it's very poorly documented (no mechanical drawing, no information about maximal electrical ratings, documents in Chinese, wiki referring to graphical proprietary Windows tools) and poorly supported by software (I couldn't make Debian work, community Armbian is unstable).
I would still recommend it, if you accept to spend hours fixing things and don't expect it to work out-of-the-box. My board currently runs a Luanti server, a Duniter blockchain node, and can compile Rust without problem and without restarting randomly.
Nobody paid me to write this. I just hope it will be useful to someone who, like me, struggles to find reliable information and concrete experience about these new SBCs.